
1. Concept
The AI Chief Accountant Assistant app controls completion of Accounting-department tasks and is aimed at chief accountants and managers responsible for those tasks. It is especially helpful during time-critical operations such as month-end close, year-end close, or audit preparation.
Key features
-
Define any number of control scenarios for different situations.
-
Run an evaluation at any moment – on the whole scenario, a selected section, or a single task.
-
Write task conditions in natural language.
-
AI support delivers a level of flexibility previously impossible.
-
Full oversight of evaluation results – the system not only checks each condition but also explains its decision and lets you inspect the underlying data.
2. Prerequisites
a) Installation
b) Activation
-
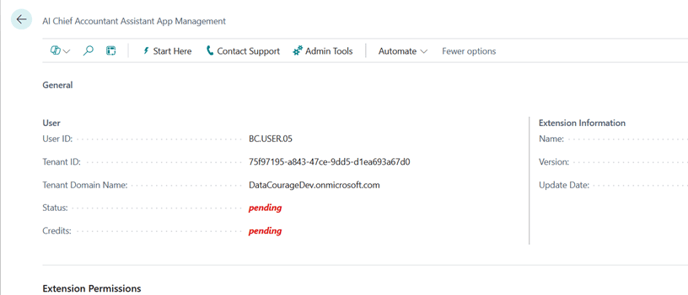
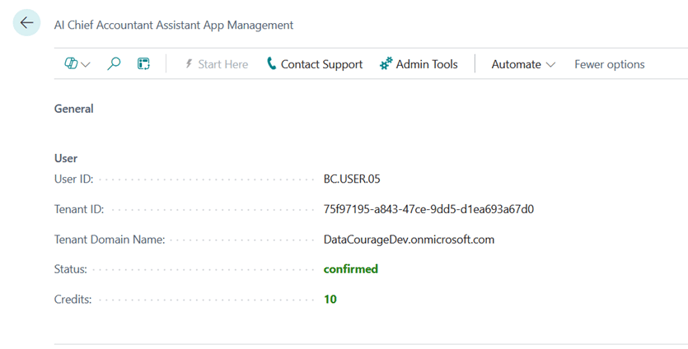
Open the app management from the main ribbon on the Chart of Accounts page.

-
In the App Management page that appears, choose Start Here.
-
After clicking Start Here, a Partner information window will appear, where you need to provide your company’s Partner name and contact Partner email address. After confirming, you will receive a message about the activation of your license.
-
If you have already provided this information, you will receive a popup – click Yes to activate your license.

-
-
Following this action, the application status will change to confirmed.
c) User Setup
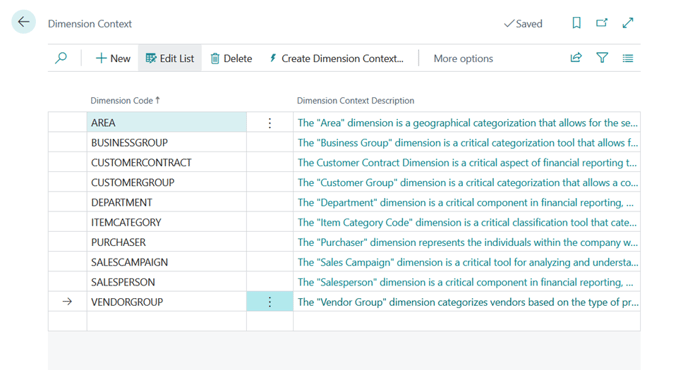
d. Dimension Context
-
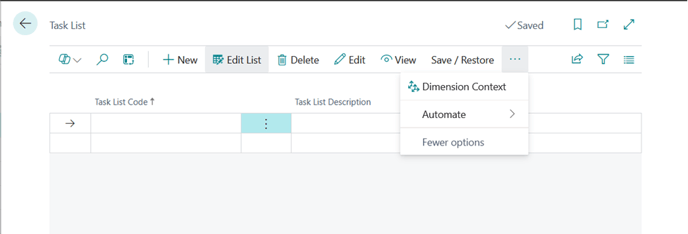
Open from the main ribbon on the Chart of Accounts page.
-
In the Task List page that appears, choose the three-dots menu and select Dimension Context.
-
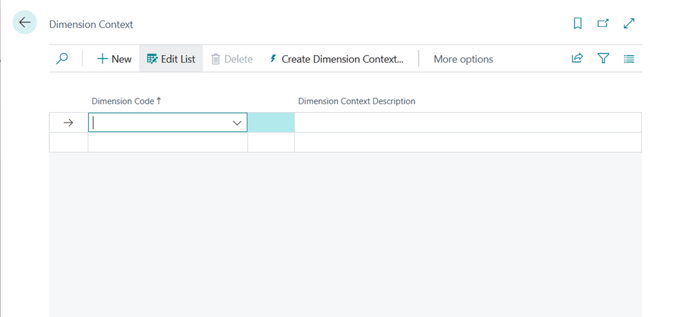
In the Dimension Context page, choose Create Dimension Context.
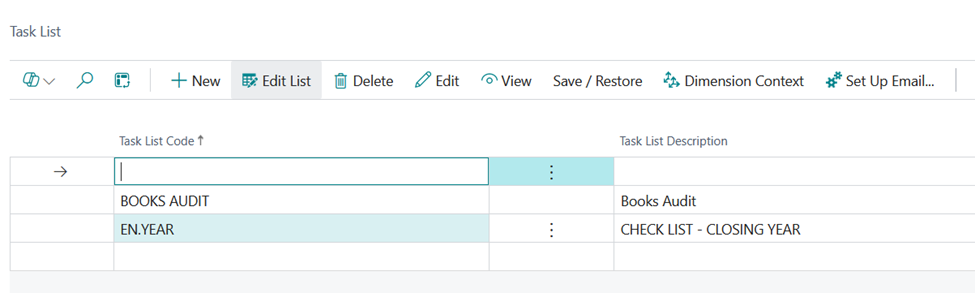
3. Creating a Task List
-
Open the app from the main ribbon on the Chart of Accounts page.
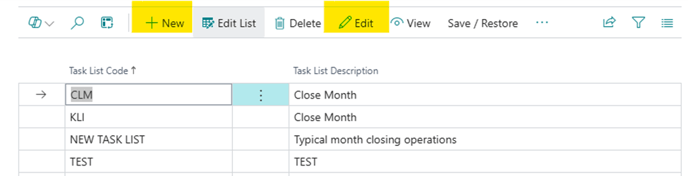
-
In the Task Lists page that appears, choose + New on the ribbon.
-
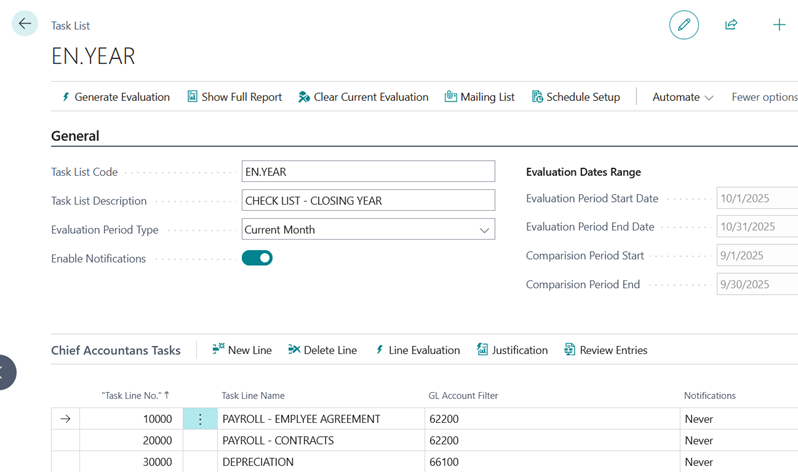
Enter a Task List Code and Task List Description.
4. Defining Tasks
-
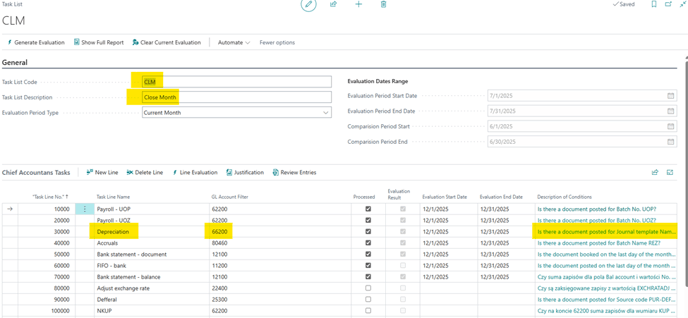
In the Task List, scroll to the Chief Accountant Task section and choose New Line.
-
Enter the Task Name (the Task Line No. fills in automatically).
-
Set the G/L Account Filter; use the lookup to select accounts. The filter must include at least one account of type Posting.
-
Select Description of Conditions to open the editor.
-
Write the condition text and choose OK.
-
Add further task lines as needed or proceed to evaluation.
5. How to Write Conditions
To ensure reliable results, follow these guidelines:-
Phrase each condition so it can be answered Yes/No.
-
Conditions must relate to entries in the General Ledger Entry table.
-
Reference any field(s) or posted amounts in those entries.
-
You may query values stored as dimensions.
-
Compare document count, entry count, or summed amounts with another period (typically the previous month).
-
Avoid strict equality (“must equal …”). Instead, use “approximately”, “roughly”, or specify an allowed tolerance (%) or amount.
-
Limit the account range as much as possible — fewer records mean faster, more reliable evaluation.
-
Avoid very complex conditions that blend multiple topics; you can analyze the same account several times under separate tasks.
-
Refer to specific field names from G/L Entry whenever possible.
-
Be precise: state whether you are checking an amount, number of unique documents, number of entries, unique values in a field, etc.
-
For text fields you can use similar to, containing, starts with, etc.; exact matches are not required.
-
Avoid basing checks purely on the Description field — this can generate very large datasets that strain the AI.
-
Write conditions as if explaining them to a new employee; they should be clear and actionable.
6. Performing Task Evaluation
You can evaluate tasks line-by-line, for selected lines, or for the entire list.
-
Open Task Lists, select the list, and choose Edit (use View for read-only access).
-
Only lines with Processed = No can be evaluated.
-
To reset a line, set Processed = No manually or choose Clear Current Evaluation on the ribbon.
-
Set the Evaluation Period Type (Current Month, Previous Month, or Custom). The dates appear in Evaluation Dates Range; for Custom you can edit them directly.
-
To evaluate a single line: select it and choose Line Evaluation. When finished, the system fills Evaluation Start Date, Evaluation End Date, Evaluation Result, and marks the line Processed = Yes.
-
View details with Justification (AI explanation) and Review Entries (source data).
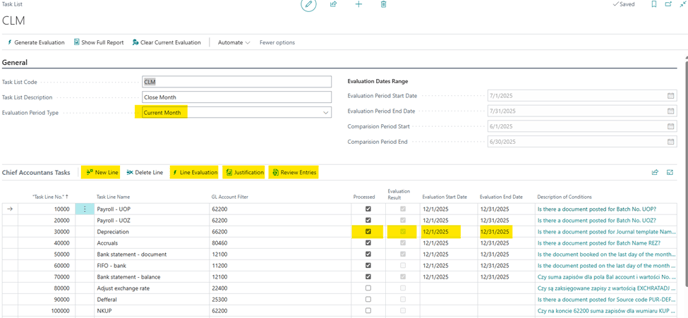
-
To evaluate all unprocessed lines at once, choose Generate Evaluation. A progress window lets you cancel without losing completed results.
7. Additional Functions
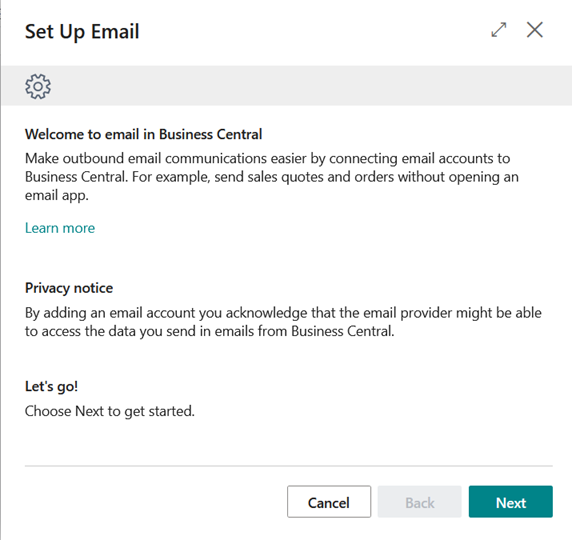
You can get email notifications for your task lists.
Setup:
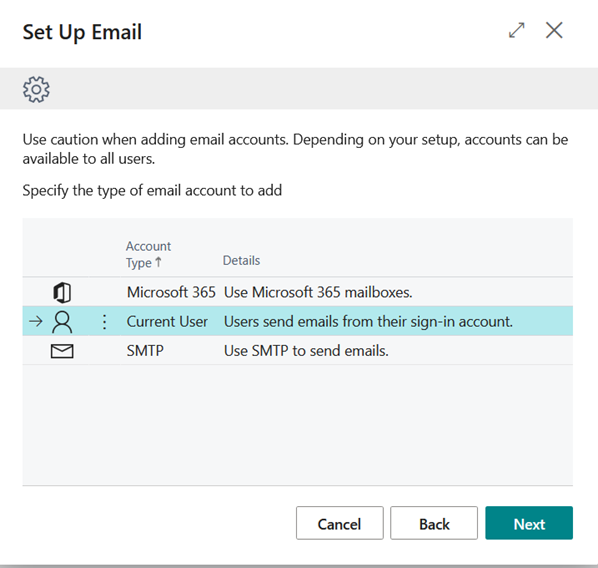
- Open application and click on “Set Up Email” to configure your BC email connection
- Open the task from which you want to receive notification.
- In the task list, toggle “Enable Notification”
- To set the email address to which notifications will be sent, open the “Mailing List” from the task bar
- Enter email addresses into table

- To set the email address to which notifications will be sent, open the “Schedule Setup” from the task bar
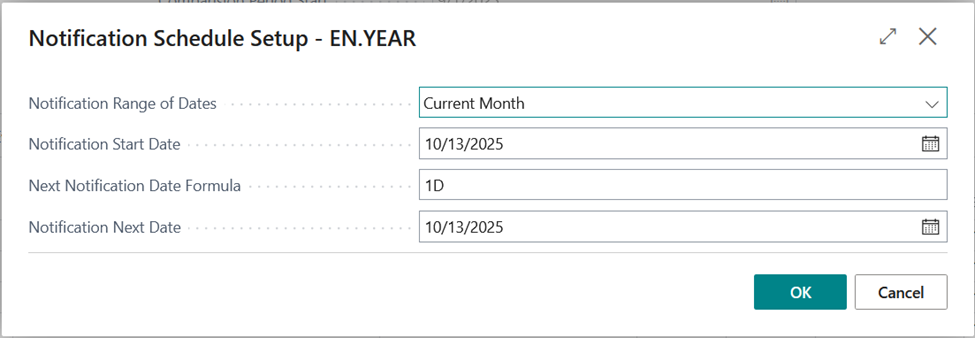
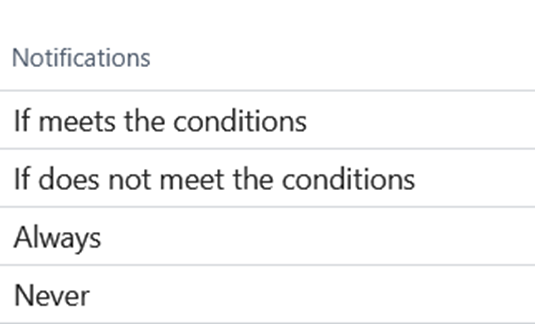
- In the Chief Accountant Tasks table, in the Notifications column, select the condition for which notifications should be sent for individual tasks.
8. Additional Functions
-
Evaluation Report – export the current results to Excel with Show Full Report.
-
Import/Export Task List – export a task list to a text file and import it into another (or the same) company; you’ll be prompted for a new Task List Code when necessary. Accessible from the Task Lists ribbon.
